Difference between revisions of "Lasered acrylic con badges"
| (One intermediate revision by one user not shown) | |||
| Line 2: | Line 2: | ||
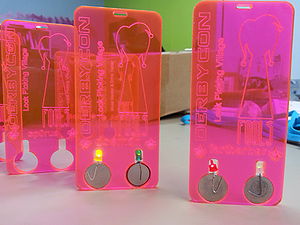
[[Image:2014_derbycon_acrylic_badges.jpg|none|thumb|300px|Laser cut acrylic badges]] | [[Image:2014_derbycon_acrylic_badges.jpg|none|thumb|300px|Laser cut acrylic badges]] | ||
| + | |||
| + | The battery holes fit CR3032 batteries and standard size LED's. | ||
== Lessons Learned == | == Lessons Learned == | ||
| Line 13: | Line 15: | ||
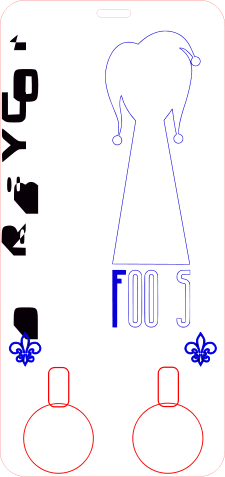
This is another badge I made for another group of friends that same weekend. | This is another badge I made for another group of friends that same weekend. | ||
[[File:2014_infonomicon-derbycon_badge.svg]] | [[File:2014_infonomicon-derbycon_badge.svg]] | ||
| + | |||
| + | |||
| + | [[Category:Dosman projects]] | ||
Latest revision as of 11:17, 3 January 2019
For Derbycon 4 I wanted to try to make some acrylic con badges for my lock picking village volunteers. I had yet to do any real vector based projects with our laser and this was a good excuse to learn. I started by working through a couple Inkscape tutorials and then looked up some specific help on bitmap conversions. I added holders for two batteries with LED's attached to make the badges glow.
The battery holes fit CR3032 batteries and standard size LED's.
[edit] Lessons Learned
I got lucky when I was making the battery holes. I just measured the batteries with calipers and then made the holes the same size. This turned out to be very tight, but since there was such a thin piece of acrylic at the bottom it just split when the battery was forced in. This seemed to work very good. I did end up making the hole slightly larger in later revisions but it was still a tight fit which was fine. I used 1/4" fluorescent red acrylic which looks pink. When I get around to reordering more acrylic I will probably use thinner material.
[edit] Downloads
Here is my .svg file for the badges. Some browsers seem to not render the .svg format properly, it does render properly in Inkscape however. Note that you will need to manually adjust your lasers speed and power settings based on color - black and blue should be at 60% speed 100% power for 1/4" acrylic, and red should be at 14% speed and 100% power to cut completely through 1/4" acrylic.
This is another badge I made for another group of friends that same weekend.

